 A lot more was shot than was printed. One of the first things you’ll notice about shooting film and printing in a darkroom instead of scanning negatives is that you don’t wind up with as many prints to show. We’re going the full-blown wet darkroom route, so the only time we have anything to publish is after prints have dried. We don’t own a film scanner and that’s not planned. I do plan to try my hand at digitally photographing negatives using a Nikon bellows and slide copy attachment, but they’re still in their boxes.
Another reason for the meager few images in this post is that 2013 was our first darkroom summer and we were just getting organized. These are all scans of wet prints from the enlarger and developing tray. They aren’t as sharp here as in real life; I’ve discovered that my Canon MF4370dn multifunction printer with its flatbed scanner, regardless of how I press the print into the glass, doesn’t produce an image as sharp as the print. That holds true with fiber matte and glossy RC paper. I might try photographing the prints with a digital camera on a copy stand over the vacuum easel to see if that helps, but that will take a while based on where it is on my to-do list. I hope the slide copier negative photographing route works for obvious reasons. I read a theory that there are so many bellows and copy attachments on the Bay because of the amount of time “scanning” takes using them, but I’ll have to learn the hard way.
Print scans were straightened and cropped in Photoshop and exported from Lightroom, but only adjusted to look as close as possible on a calibrated monitor to the paper prints. Adjustments on these were only increasing the black level that went too light during scanning. The actual prints are borderless, made on a DIY vacuum easel that I’ll write about soon sometime. Borders are from WordPress, left in place for some separation between page and image.
Dad is rarely in vacation photos as is the case in this Bethany Beach, DE shot of the girls lounging at the shore. This was shot on Polypan F at ASA 50 in a Kodak Instamatic 500. The camera is all manual except for a selenium cell light meter, so a natural for shooting film speeds that weren’t native to 126 cartridges. This is also a terrible example of what Polypan can do, by the way, so don’t let that scare you away from trying the film. I write this off to it being one of my first rolls and first times using Adonal (Rodinal) and way more grainy that it should have been. Technique, technique, technique… Immediately after taking the film out of the Adonal I thought I’d botched the whole roll because I hadn’t wound the film far enough between images. I was shooting one dark exposure between frames but should have used two. This landmark image was salvageable. I’ve since decided to use the backing paper as a frame counter, but make sure to wind three frames if you shoot it without it. While on the backing paper topic, I suggest it because I’ve had some nasty scratches from burs left from cassette opening, and the paper will serve as an insulator in addition to a frame counter.
Something else shooting with cameras that think does is make one a very sloppy photographer by relieving one of that responsibility. The Instamatic 500 has a viewfinder, but not a rangefinder. Remembering to manually set distance with it was a bit hard to reacclimate to and quite a few frames had blown focus.
I hear some of you objecting with, “But our auto-everything cameras give us more time to be creative.” We didn’t just start turning out great photographs when we got automation, did we? We had to be creative then, and that included setting our own focus and our own exposure. We had to be even more creative to nail “wow” images then. Don’t believe me? Go to Sports Illustrated photographer Neil Leifer’s site and look at his images. Neil used his wits for these iconic images, not auto-everything. Read Larry Berman’s 2002 interview with Neil to get a better insight into Neil’s photographic genius.
We got a cool image out of the roll, though. The banding at left is the frame overlap that we covered up a bit with burning in while printing, but I kind of like it this way. It screams WE DID THIS OURSELVES! Hey – this is art, and fun; not stock for Magnum. Oh, the horizon is also a little tilted; not something you want in a print to hang, compete or sell, but I missed it on the easel and am not going to go back and reprint it for that.
The little specs that look like dust? They’re dust. Let this be a lesson to you that you have to be meticulously clean in the darkroom to make this all work. The only healing brush or clone stamp comes in the form of a tiny retouch brush and spotting dye, and you probably don’t want to start with that. Think wet darkroom is a time-consuming craft? Try print spotting.

Our Deep Creek Lake, MD getaway was a nice opportunity for Addison to shoot. No grand architecture, but a boat dock, her dog, her Nikkormat and some HP5. Berkley the dog cooperated by lounging on the pier for some puppy portrait practice. Note the proper grip on the camera.

Berkley’s portrait is tack sharp in the print, which is the photo that made the scanner’s weakness perfectly clear. Metering was from her hand as a gray card, then opened up a stop, I think, so Berkley wouldn’t go black. I was amazed at the negative and its print. Xtol was the film developer and Formulary’s BW-65 did the print on Adorama fiber matte paper. Ultrafine Plus 400 developed in Xtol.

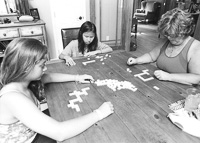
Two daughters – one at home in front of the lens; the other behind it. That just works out.

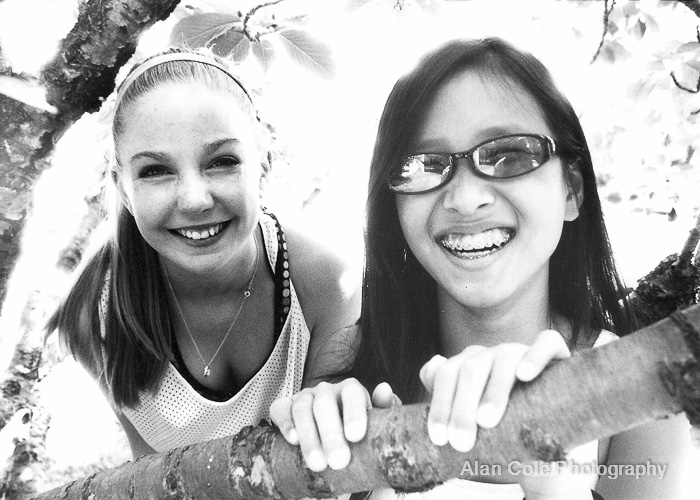
My model and a friend. Polypan F straight into the sun. That’s brutal for any film or sensor, but film without antihalation backing? BEAUTIFUL! Metered Ally’s face close-up with the F2’s meter and went with it. I’d like to have a comparison negative with standard camera film to see the difference in the glow.